Для успішного виконання польоту, в тому числі і для того, щоб Ви по максимуму насолодилися процесом від автентичності виконання процедур, маючи чудовий вид з вікна Вашої кабіни, наше співтовариство пропонує скористатися сценаріями і схемами тих аеропортів України, які Ви плануєте відвідати. Ми намагаємося регулярно оновлювати цей розділ сайту відповідно до останніх оновлень аеронавігаційної інформації, так само як і оновлювати сценарії аеропортів.
Ми надаємо сценарії на безкоштовній основі і не маємо авторських прав на них, так як вони належать відповідним розробникам.
Більшість сценаріїв сумісні з різними версіями симуляторів, а це значить Ви можете спробувати використовувати сценарій, навіть якщо він не призначений саме для Вашого симулятора.
| UKBB | Київ Бориспіль | BRIEF | JEPP | FSX P3D XPL MSFS |
| UKCC | Донецьк | JEPP | XPL | |
| UKCM | Маріуполь | XPL | ||
| UKCW | Луганськ | JEPP | XPL | |
| UKDD | Дніпро | JEPP | FSX P3D XPL | |
| UKDE | Запоріжжя | JEPP | FSX MSFS | |
| UKDR | Кривий Ріг | JEPP | XPL | |
| UKHH | Харків Основа | JEPP | FSX XPL MSFS | |
| UKHK | Кременчук | XPL | ||
| UKHS | Суми | AIP | XPL | |
| UKHV | Харків Північний | XPL | ||
| UKKE | Черкаси | AIP | XPL | |
| UKKG | Кропивницький | JEPP AIP | XPL | |
| UKKK | Київ Жуляни | JEPP | P3D XPL | |
| UKKM | Київ Антонов | JEPP AIP | FSX XPL | |
| UKKT | Київ Святошин | JEPP AIP | XPL | |
| UKKV | Житомир | XPL | ||
| UKLI | Івано Франківськ | JEPP | FSX P3D XPL MSFS | |
| UKLL | Львів Данило Галицький | BRIEF | JEPP | FSX/P3D XPL MSFS |
| UKLN | Чернівці | JEPP | XPL MSFS | |
| UKLR | Рівне | JEPP | P3D XPL | |
| UKLT | Тернопіль | AIP | XPL MSFS | |
| UKLU | Ужгород | BRIEF | JEPP | FSX XPL |
| UKOH | Херсон | JEPP | P3D XPL MSFS | |
| UKOM | Лиманське | XPL | ||
| UKON | Миколаїв | BRIEF | JEPP | XPL |
| UKOO | Одеса | JEPP | FSX P3D MSFS | |
| UKWW | Вінниця Гавришівка | JEPP | XPL | |
| VFR Charts | Карти для візуальних польотів | AIS |
По-перше, Вам необхідно зареєструватися в мережі VATSIM. Просто перейдіть по посиланню сюди. Це приведе Вас на форму реєстрації, де лише потрібно буде заповнити необхідні поля. Будь ласка, заповнюйте їх справжньою інформацією про себе і з розумом вибирайте ваш дивізіон.
Обзаведіться симулятором. На поточний момент існує безліч різних видів симуляторів - Microsoft Flight Simulator, Prepar3D, X-Plane. Яким з них користуватися - Ваш особистий вибір. На жаль, на цьому етапі ми нічим допомогти Вам не можемо. Просто візьміть свою копію симулятора і встановіть її на ваш ПК.
Скачайте і встановіть програму-клієнт. Кожна версія програми використовується з певною версією симулятора, тому ми склали для Вас невеликий список. Виберіть потрібний Вам клієнт відповідно до того симулятора, який Ви використовуєте.
Запустіть симулятор і зайдіть в налаштування клієнта. Перед роботою Вам необхідно його налаштувати, а саме ввести своє ім'я і позивний, а також вибрати сервер AUTOMATIC.
Ви готові до польоту, Вам залишилося тільки підключитися до мережі, запустити двигун і можете злітати ...
Пам'ятайте, що при польотах в мережі, Вам слід переконатися в тому, що Ви не будете робити помилок при пілотуванні. Це вимагає від Вас вивчення Вашого літака, його систем і того, як ними користуватися.
Тому радимо приділити час на те, щоб почитати інструкції з управління тим літаком, який Ви обрали. Якщо ж читання Вас лякає - завжди можна знайти навчальні відео на YouTube.
Перш ніж злітати, визначтеся куди і як Ви летите. Літаки не літають по прямій лінії, і як будь-якому іншому транспорту їм потрібен маршрут, що включає точки поворотів і повітряні траси. Так само слід правильно вибирати висоту польоту відповідно до правил. В Україні всі польоти в західному напрямку виконуються на парних висотах, а в східному напрямку - на НЕ парних висотах.
Більше про планування ...
Так як Ви летите серед інших пілотів, Вам слід подумати про те, як уникнути конфлікту з ними в польоті. Це включає оцінку погодних умов, наприклад, при виборі злітно-посадкової смуги слід пам'ятати, що літаки злітають проти вітру. Інший важливий момент полягає в тому, що при відсутності диспетчера пілоти літають не координовано, тому всім слід відстежувати повідомлення на Unicom і там же повідомляти про свої дії іншим.
Більше про погоду ...
Не лінуйтеся! Це серйозне хобі, яке дає Вам безмежні можливості - від практикування свого англійського, до вивчення авіаційного права і процедур. Завжди продовжуйте вчитися і покращувати свої навички пілотування. Ми регулярно будемо Вам допомагати в цьому. Таким чином скоро Ви не тільки повністю опануєте польотами в симуляторі, але, можливо, це навіть допоможе Вам у вашому житті.
Документи ...
Крім тієї інформації, яку ми надаємо Вам тут, ми також пропонуємо Вам пройти навчання в нашій Школі Пілотів, де Ви можете вивчити основи виконання польотів, а також отримати рейтинги.
Мета планування в тому, щоб мати уявлення про те, як долетіти з аеропорту вильоту в аеропорт прибуття. Ми розділимо планування на три етапи:
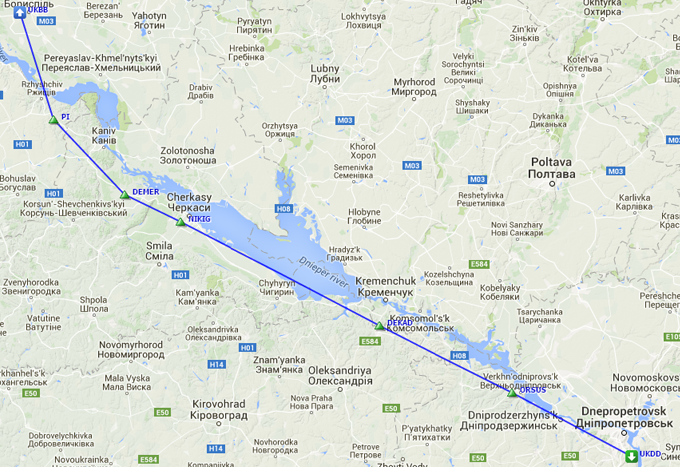
Для прикладу давайте складемо маршрут. В першу чергу необхідно вирішити звідки і куди буде виконуватися політ, наприклад, з аеропорту міста Київ - Бориспіль до Дніпропетровська. Знаючи куди ми летимо, ми так само можемо дізнатися коди ІСАО цих аеропортів - UKBB і UKDD відповідно.
Тепер, маючи коди, ми можемо скласти сам маршрут. Він являє собою навігаційні точки і повітряні траси, які з'єднують їх. Існує два способи скласти маршрут: користуючись навігаційними картами або використовуючи генератори маршрутів. В результаті отримаємо маршрут:
PI L33 DEMER M70 ORSUS
Як Ви бачите, він складається з точок (PI, DEMER, ORSUS) і трас (L33, M70). Вони знадобляться нам для здійснення навігації вручну або за допомогою автопілота.
Після визначення маршруту, нам потрібно визначитися з висотою польоту. Правила вибору висоти на території України досить прості - при польоті в західному напрямку висота (ешелон) повинна бути парною, при польоті в східному - НЕ парною. Так само в нашій країні застосовується концепція скорочення вертикального ешелонування RVSM, завдяки чому різниця між протилежними за направленням трасами складає 1000 футів. Для подання цієї концепції ми підготували для Вас невелику таблицю, таким чином сітка висот будується від землі до висоти 66 000 футів.
| ЗАХІД (179° - 360°) | СХІД (001° - 180°) |
|---|---|
| FL320 (32 000ft) | |
| FL310 (31 000ft) | |
| FL300 (30 000ft) | |
| FL290 (29 000ft) | |
| FL280 (28 000ft) |
Наш маршрут лежить на схід, а значить висота польоту повинна бути не парною. Виберемо її в залежності від типу літака, на якому будемо летіти - чим більше літак, тим вище він може летіти. Наприклад при польоті на Boeing 737 ми з легкістю можемо зайняти висоту в 29 000 футів, що відповідає ешелону 290 (просто відкиньте останні два символи від висоти).
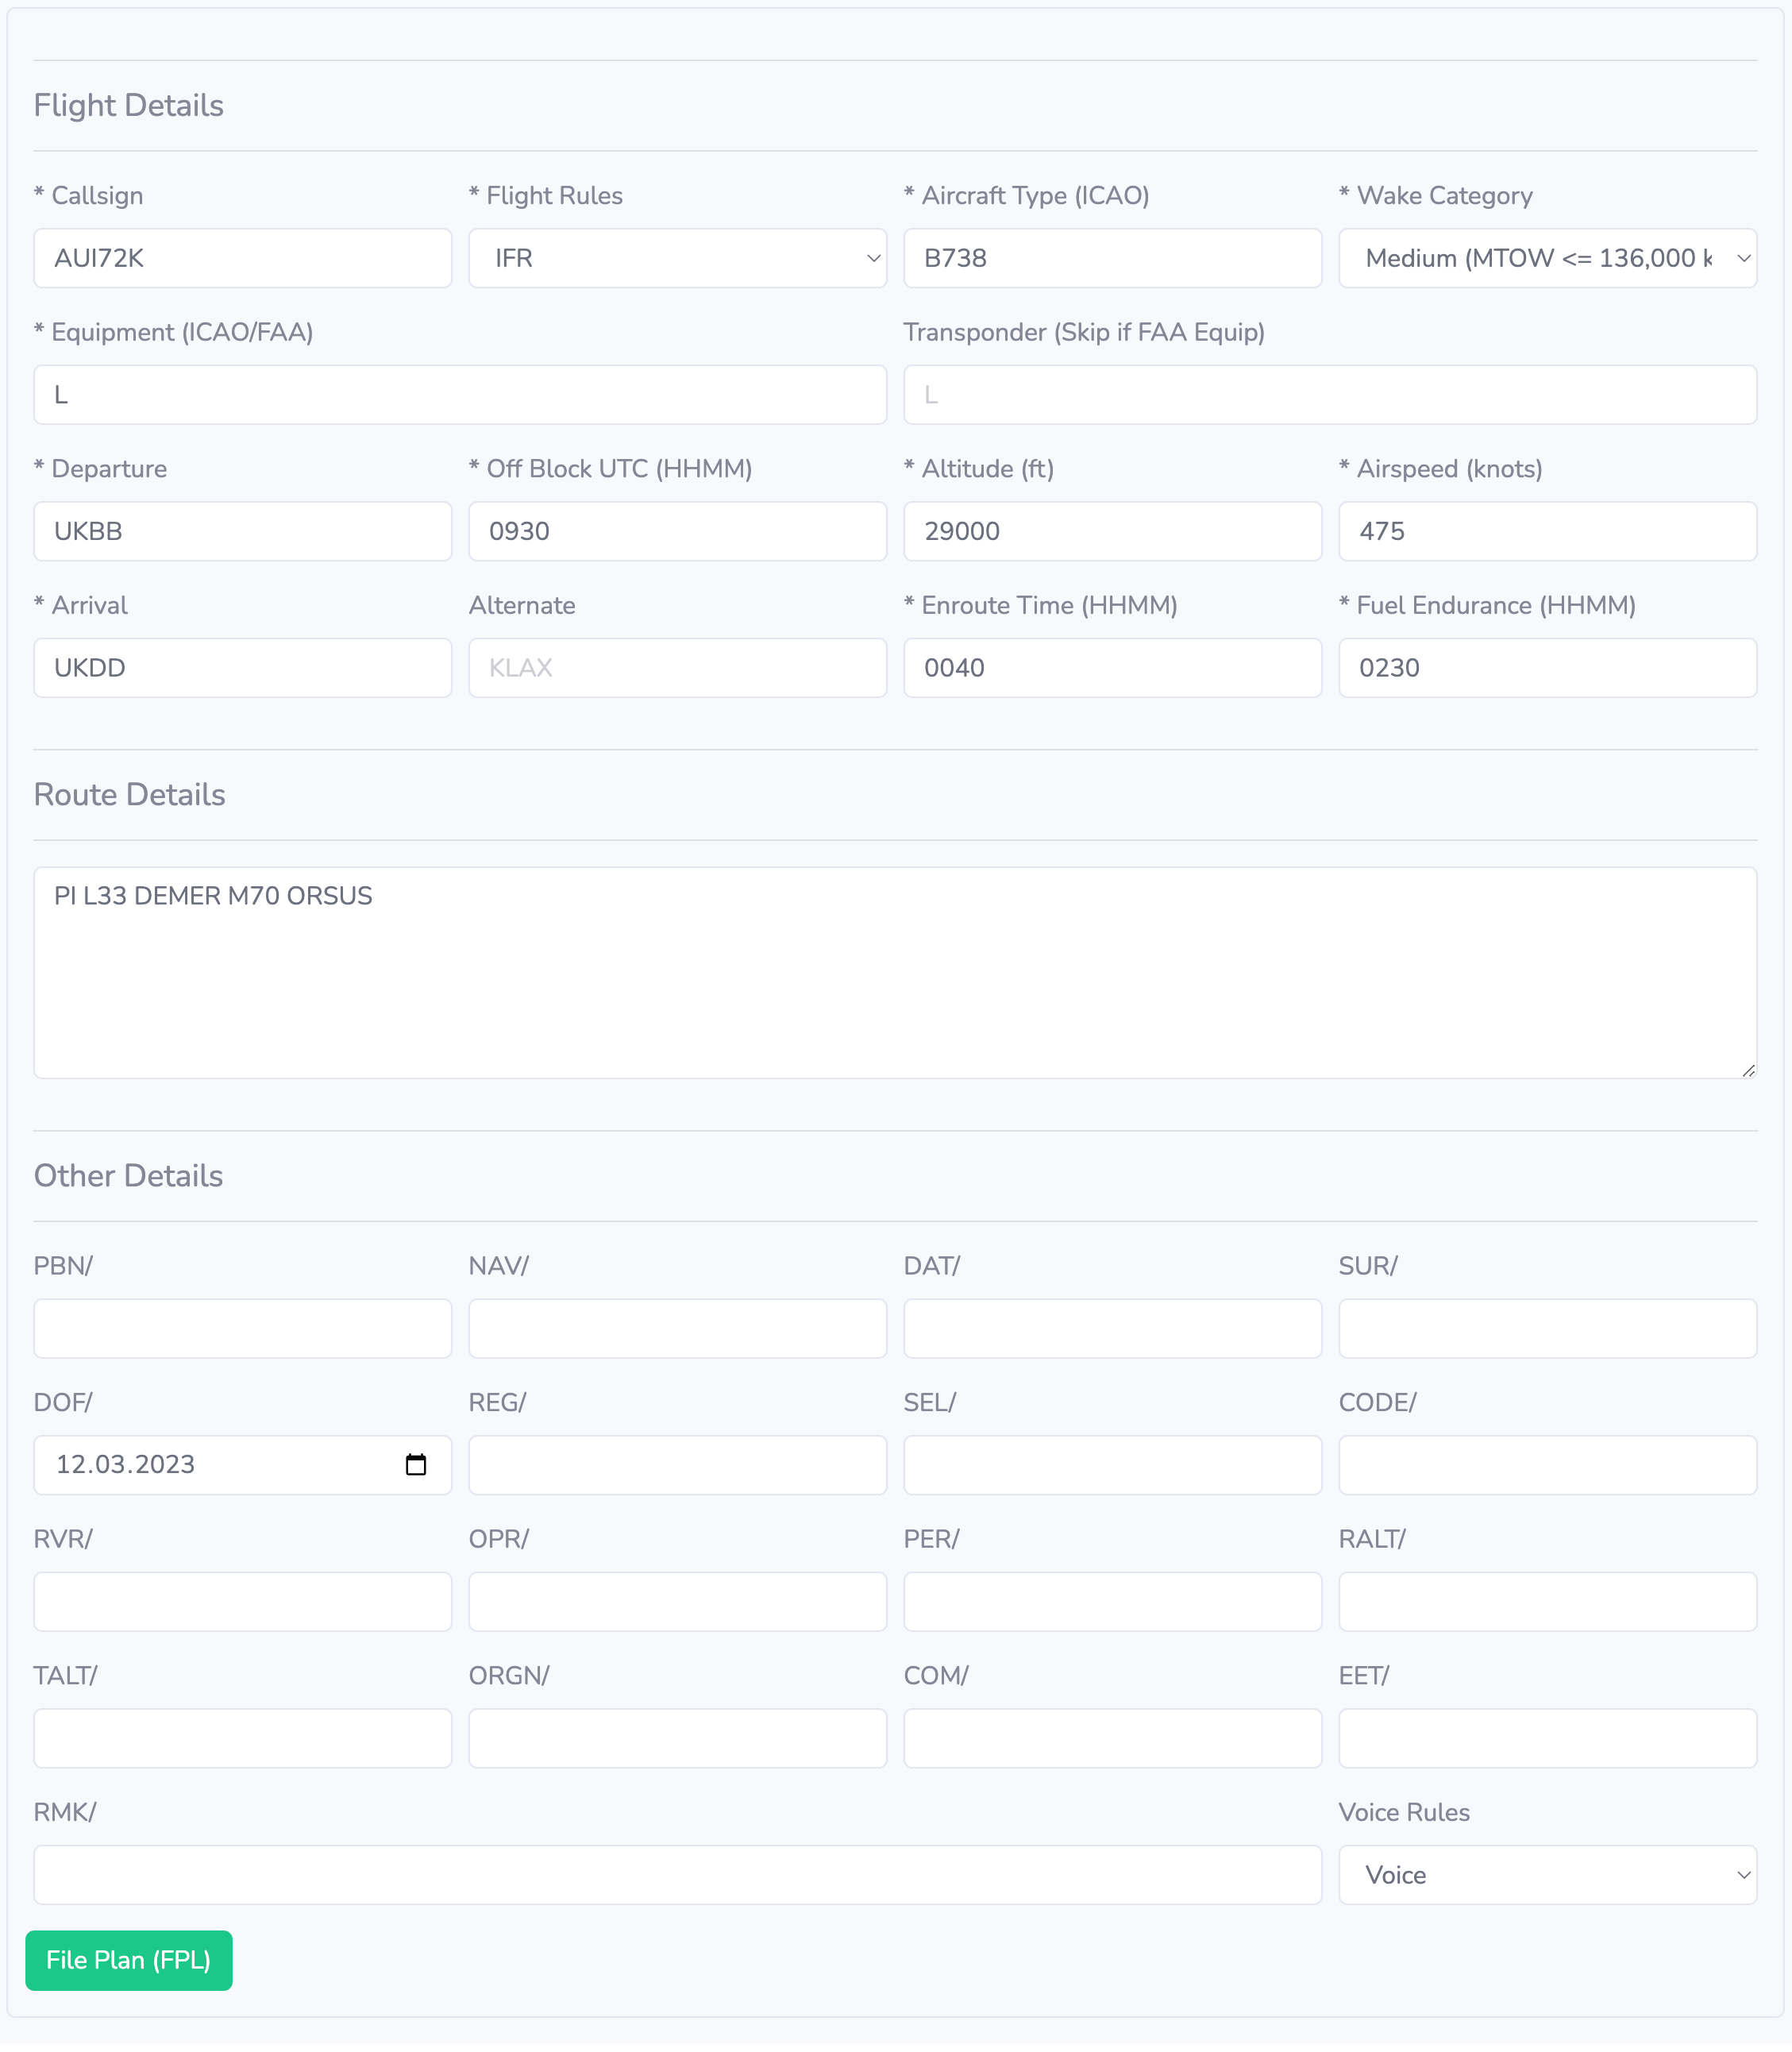
Останній етап - це заповнення плану польоту і відправка його в VATSIM. Незалежно від того, який тип польоту Ви маєте намір зробити, якщо Ви плануєте злітати - план польоту повинен бути поданий. Існує два способи щоб подати план польоту - через функцію клієнта в симуляторі або ж на спеціальному сайті тут.
У будь-якому випадку, поля які Вам належить заповнити однакові, давайте розглянемо їх:
Callsign – ваш позивний зазвичай складається з реєстраційного номера (наприклад UR-PSA) або індексу авіакомпанії з номером рейсу (наприклад AUI72K).
Flight Rules - правила польотів IFR для польотів за приладами і VFR для візуальних польотів.
Aircraft type – 4 символу ICAO коду типу повітряного судна (наприклад B738).
Wake Category - категорії турбулентності повітряного судна. Існує 4 категорій турбулентності:
Головним джерелом інформації про погоду в VATSIM є закодовані повідомлення METAR. Такі повідомлення публікуються кожні 30 хвилин для більшості аеропортів по всьому світу і вільно доступні в інтернеті. Вони містять декілька видів надзвичайно важливої метеорологічної інформації, такий як параметри вітру, явищ погоди, тиску повітря, стану злітно-посадкової смуги і т.д. Для того, щоб розкодувати і зрозуміти інформацію, зашифровану в коді METAR, розглянемо наступний приклад.
METAR UKBB 030800Z VRB02MPS 9999 BKN050 M19/M20 Q1028 86411040 36821040 NOSIG
Такий код ми можемо отримати за запитом UKBB для аеропорту Київ Бориспіль.
METAR - ідентифікатор типу закодованої інформації, в нашому випадку регулярна зведення погоди.
UKBB - аеродром для якого складена дана зведення.
030800Z - дата (03) і час (0800Z) спостереження.
VRB02MPS - перші три символи - напрямок вітру в градусах (VRB - вказує на те, що напрямок вітру змінний ) і наступні символи - швидкість вітру і одиниці її вимірювання (02MPS).
9999 - видимість у землі в метрах, якщо вказано число 9999 - видимість більше 10 кілометрів. Якщо замість видимості вказано код CAVOK - видимість більше 10 кілометрів, відсутні небезпечні явища погоди і хмари з нижньою межею хмарності нижче 5000 футів. Якщо з яких-небудь причин неможливо визначити видимість у землі, використовують видимість на ЗПС, наприклад, R36L / 5000, де R36L позначає смугу 36L, а видимість на ній становить 5000 метрів.
BKN050 - тип і висота нижньої межі хмарності в сотнях футів, в даному прикладі хмари розірвані (broken) з нижньою межею на висоті 5000 футів. Ви можете зустріти наступні типи хмарності: FEW - fewer незначна, SCT - scattered розсіяна, BKN - broken розірвана і OVC - overcast суцільна. Якщо після висоти нижньої межі хмарності зазначена абревіатура CB, вона вказує на наявність купчасто-дощових хмар.
M19 / M20 - температура і точка роси в градусах Цельсія (-19° і -20°), символ M вказує на температуру нижче нуля.
Q1028 - тиск повітря в гектопаскалях 1028hPa.
86411040, 36821040 - стан злітно-посадкової смуги:
Більш докладно процес розшифровки коду METAR описаний в нашій інструкції ...
Тепер давайте задамося кількома питаннями...
У першу чергу нам потрібно визначити, при такій погоді чи можемо ми летіти в принципі. Існує безліч обмежень, що стосуються видимості і хмарності, особливо при візуальних польотах. Якщо поточні умови нижче мінімумів - виконувати політ стає неможливим. Навіть незважаючи на те, що ми літаємо віртуально, проте ми рекомендуємо Вам брати до уваги погодні умови та Ваші навички пілотування в поганих погодних умовах при прийнятті рішення на виконання польоту. Ось деякі з основних мінімумів, використовуваних в цивільній авіації:
| VFR | CAT I | CAT II | CAT IIIA | CAT IIIB | CAT IIIC | |
|---|---|---|---|---|---|---|
| НИЖНЯ МЕЖА ХМАР | 1000 ft | <200 ft | 200-100 ft | 100-50 ft | >50 ft | 0 ft |
| ВИДИМІСТЬ | 5000 m | <550 m | 550-350 m | 350-200 m | 200-50 m | 0 m |
Якщо поточні погодні умови нижче даних мінімумів, можливо краще відкласти політ.
Якщо в потрібному Вам аеропорту є диспетчер, Ви навряд чи поставите це питання, адже диспетчер сам повідомить Вам робочу смугу. Однак якщо диспетчера на даний момент немає, Вам доведеться визначити її самостійно, для цього нам і потрібні параметри вітру.
Як Ви вже знаєте літаки злітають і сідають проти вітру. У нас вже є напрям звідки дме вітер, отримане з коду METAR, курс смуги ми можемо дізнатися або з карт аеродрому, або приблизно визначити додавши в кінець номера смуги нуль. Таким чином обчислити робочу смугу досить легко - чим ближче один до одного напрямок вітру і курс смуги - тим краще, а значить при вітрі, наприклад, 330 градусів і смугами 18 і 36 ми бачимо, що різниця в вітрі між курсами 330 і 360 всього 30 градусів, значить це і буде робоча смуга.
Ми вимірюємо висоту за допомогою барометричного приладу, так що по суті, то що Ви бачите на шкалі - НЕ висота, а різниця між тисками на початковій і поточної висоті. При польотах на великих висотах ми встановлюємо на висотомірі тиск QNE рівне 1013.2 гПа, завдяки цьому на всіх літаках висотоміри не розходяться в показаннях висоти. Але на малих висотах польоту нам також потрібно враховувати перешкоди на землі. Для цього на картах наносять їх висоти, однак якби ми все ще використовували стандартний тиск в 1013гПа, ці висоти постійно змінювалися б, так як тиск повітря не постійний. Щоб ми могли використовувати постійні висоти перешкод нам необхідно встановлювати тиск аеродрому, наведене до середнього рівня моря QNH, яке ми отримуємо з METAR, завдяки чому всі висоти на картах завжди будуть відраховуватися від середнього рівня моря і не будуть змінюватися при зміні тиску.
Під час набору висоти ми будемо перетинати так звану висоту переходу - висоту, на якій потрібно змінити тиск на висотомірі з QNH на QNE. Ця висота вказана в картах аеродромів, а в Україні вона становить 10 000 футів.
При зниженні ми будемо перетинати ешелон переходу - ешелон, на якому висотомір встановлюється з тиску QNE на QNH аеродрому прибуття. Його ми отримуємо з METAR або ж від диспетчера. Ешелон переходу так само опублікований на картах, в Україні він змінюється в залежності від тиску QNH і може бути ешелоном 110, 120 або 130.
ПРИЄДНУЙТЕСЬ